Classic Margherita Pizza Recipe
There is something special about making pizza from scratch. The smell of fresh dough, the rich tomato sauce, and the melted mozzarella create a meal that is both comforting and satisfying. If you have never tried making pizza at home before, this Classic Margherita Pizza recipe is the perfect place to start.
Unlike many pizza recipes that require complicated techniques or expensive ingredients, Classic Margherita Pizza is known for its simplicity. It uses only a few fresh ingredients, yet the result is a pizza with incredible flavor. Every bite combines a soft homemade crust, fresh tomato sauce, creamy mozzarella cheese, and fragrant basil.
One of the best things about this recipe is that it is beginner-friendly. You don’t need professional equipment or years of baking experience. With a little patience and a few basic kitchen tools, you can prepare a delicious pizza that your family and friends will enjoy.
Whether you’re planning a weekend dinner, a family gathering, or simply want to enjoy homemade Italian food, this Classic Margherita Pizza recipe is a great choice.
Table of Contents
Why You’ll Love This Classic Margherita Pizza
There are many reasons why this recipe has remained popular for generations.
- Easy to make with simple ingredients.
- Perfect for beginners.
- Soft and light homemade pizza dough.
- Fresh tomato sauce with natural flavor.
- Crispy edges with a tender center.
- Ready using ingredients that are easy to find.
- Easy to customize with your favorite toppings if you want to try different flavors later.
Once you learn how to make this Classic Margherita Pizza, you’ll have a reliable recipe that you can prepare again and again.
Ingredients of Classic Margherita Pizza
For the Pizza Dough
- 400 g all-purpose flour (about 3¼ to 3½ cups)
- 240 ml warm water (1 cup)
- 1 teaspoon sugar
- 1 teaspoon instant dry yeast
- 1 teaspoon salt
- 2 tablespoons olive oil
For the Tomato Sauce
One of the things that makes Classic Margherita Pizza so delicious is its fresh and simple sauce.
You’ll need:
- 2 ripe tomatoes
- A handful of fresh basil leaves (or 1 teaspoon dried basil)
- 1 tablespoon olive oil
- Salt to taste
- Black pepper to taste
Simply blend all the ingredients until smooth. If you prefer a richer flavor, you can simmer the sauce for about 5 to 10 minutes. However, using it fresh also gives the pizza a light and authentic taste.
For the Topping
- Fresh mozzarella cheese, sliced or shredded
- A few fresh basil leaves
- Extra virgin olive oil for drizzling (optional)
Kitchen Tools You’ll Need
Before you begin, gather a few basic kitchen tools to make the process easier.
- Large mixing bowl
- Measuring cups or a kitchen scale
- Wooden spoon
- Baking tray or pizza pan
- Fork
- Clean kitchen towel
- Blender or immersion blender for the sauce
If you’re just starting to build your kitchen, don’t miss our guide to Essential Kitchen Tools Every Home Cook Needs, where we explain the seven basic tools that every home cook should own before preparing everyday meals.
Preparing the Dough
Start by pouring the warm water into a small bowl. Add the sugar and instant yeast, then stir gently. Let the mixture rest for about 10 minutes until it becomes foamy. This shows that the yeast is active and ready to help the dough rise.
While waiting, combine the flour and salt in a large mixing bowl. Make a well in the center, then pour in the yeast mixture along with the olive oil.
Mix everything together until a rough dough begins to form. Once the ingredients come together, transfer the dough to a lightly floured surface and knead it for about 10 minutes. The dough should become soft, smooth, and slightly elastic. If it feels too sticky, sprinkle a small amount of flour while kneading, but avoid adding too much.
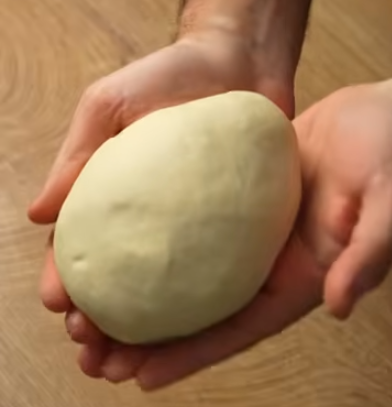
Lightly oil a clean bowl, place the dough inside, and turn it once so it is lightly coated with oil. Cover the bowl with a clean kitchen towel and leave it in a warm place until it doubles in size. Depending on the room temperature, this usually takes about one hour.
Shaping the Pizza
Once the dough has doubled in size, gently press it down to release the air. Transfer it to a clean work surface and divide it into two equal pieces. This recipe makes two medium-sized Classic Margherita Pizza bases.
Shape each piece into a smooth ball and let them rest for another 10 to 15 minutes. This short resting time helps the dough relax, making it easier to stretch.
Lightly grease a pizza pan or baking tray with olive oil, then sprinkle a little flour over the surface. This helps prevent the dough from sticking during baking.
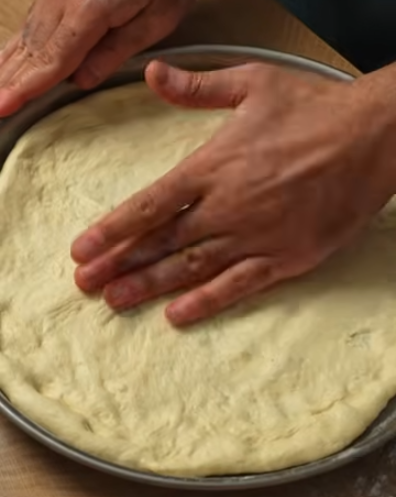
Place one dough ball onto the pan and gently press it outward using your fingertips. Start from the center and work your way toward the edges. Try to leave the outer edge slightly thicker to create a light, airy crust.
If the dough tears while stretching, simply pinch it back together with your fingers. There’s no need to start over small tears are easy to fix.
Prepare the Pizza for Baking
Before adding the toppings, use a fork to poke a few small holes across the center of the dough. This simple step helps reduce large air bubbles while the pizza bakes.
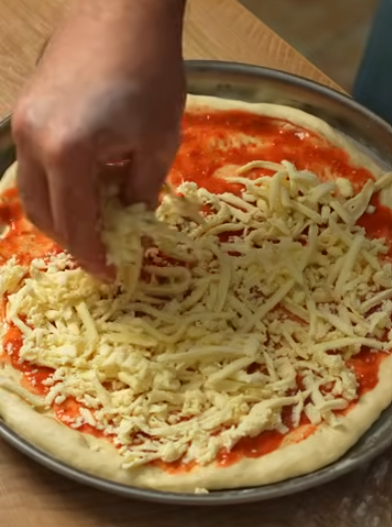
Spread a thin layer of the fresh tomato sauce over the dough, leaving about 1 inch (2.5 cm) around the edge for the crust.
One of the biggest mistakes people make is adding too much sauce. A Classic Margherita Pizza should have a balanced flavor, allowing the dough, tomato sauce, and cheese to complement each other.
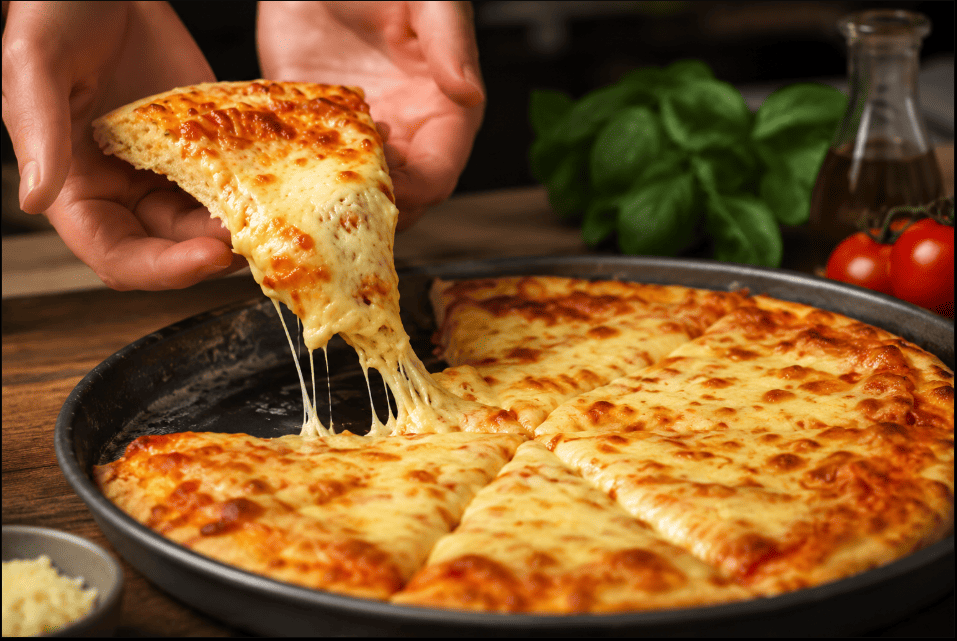
Next, evenly distribute the mozzarella cheese over the sauce. Fresh mozzarella is the traditional choice because it melts beautifully and creates the creamy texture that makes this pizza so popular.
Finally, place a few fresh basil leaves on top. If you prefer, you can add them after baking to keep their bright color and fresh flavor.
Baking the Classic Margherita Pizza
Preheat your oven to its highest temperature before placing the pizza inside. A very hot oven is one of the secrets to making an excellent Classic Margherita Pizza.
Bake the pizza for about 10 to 15 minutes, depending on your oven. You’ll know it’s ready when:
- The crust is golden brown.
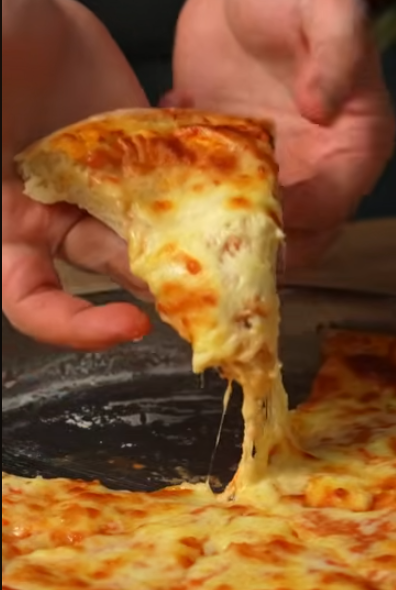
- The cheese is fully melted and lightly browned.
- The edges are crisp while the center remains soft.
Once the pizza comes out of the oven, let it rest for two or three minutes before slicing. This allows the cheese to settle slightly, making each slice easier to serve.
A light drizzle of extra virgin olive oil just before serving adds even more flavor.
Chef’s Tips for the Best Classic Margherita Pizza
Making great pizza isn’t difficult, but a few simple tips can make a big difference.
- Use warm water, not hot water, when activating the yeast. Hot water can kill the yeast before it starts working.
- Weigh your ingredients whenever possible. Baking is more accurate when measurements are based on weight instead of volume.
- Knead the dough until it becomes smooth and elastic. This develops the gluten and creates a soft, chewy crust.
- Don’t overload the pizza with sauce or cheese. Simplicity is one of the reasons Classic Margherita Pizza tastes so good.
- Always preheat your oven completely before baking.
- If you own a pizza stone or baking steel, use it for an even crispier crust.
Common Mistakes to Avoid
Even a simple recipe can go wrong if you overlook a few important details.
One common mistake is using inactive yeast. If your yeast mixture doesn’t become foamy after about 10 minutes, it’s best to start again with fresh yeast.
Another mistake is adding too much flour while kneading. A slightly soft dough will produce a lighter pizza than a dry, stiff dough.
Many beginners also bake pizza in an oven that hasn’t fully preheated. High heat is essential for creating a crisp crust while keeping the inside soft.
Finally, avoid adding too many toppings. A traditional Classic Margherita Pizza celebrates simple, fresh ingredients rather than heavy toppings.
If you’d like to improve your cooking skills even further, be sure to read our guide on 15 Common Cooking Mistakes and How to Avoid Them. It covers practical tips that can help you achieve better results in the kitchen every time.
Serving Suggestions
A freshly baked Classic Margherita Pizza is delicious on its own, but it also pairs well with a few simple side dishes.
Here are some serving ideas:
- A fresh green salad with olive oil and lemon dressing.
- Garlic bread for a complete Italian-inspired meal.
- Roasted vegetables such as zucchini, bell peppers, or mushrooms.
- A bowl of tomato soup on cooler days.
- Fresh lemonade, sparkling water, or iced tea for a refreshing drink.
If you’re serving guests, slice the pizza into smaller pieces and serve it alongside a variety of salads and appetizers for a casual family-style meal.
Complete Your Meal with a Homemade Dessert
A delicious Classic Margherita Pizza deserves a sweet ending. If you’re looking for the perfect dessert to serve after this pizza, we recommend trying our homemade dessert recipe. It’s easy to prepare, made with simple ingredients, and adds the perfect finishing touch to an Italian-inspired meal. Be sure to check out our recipe for 3 Quick and Easy Desserts You Can Make at Home and enjoy a complete homemade dining experience.
How to Store Leftovers
If you have leftover Classic Margherita Pizza, let it cool completely before storing it.
Place the slices in an airtight container or wrap them tightly with plastic wrap or aluminum foil. Store them in the refrigerator for up to 3 days.
For longer storage, freeze individual slices in freezer-safe bags or containers for up to 2 months.
How to Reheat Pizza
Reheating pizza the right way helps keep the crust crispy and the cheese delicious.
- Oven: Preheat the oven to 375°F (190°C) and bake for 5–8 minutes.
- Skillet: Heat the pizza in a dry skillet over medium heat for a few minutes. This keeps the crust crispy while melting the cheese.
- Air Fryer: Heat at 350°F (175°C) for 3–4 minutes.
- Microwave: This is the fastest option, but the crust may become softer than with the other methods.
Frequently Asked Questions
Can I make the dough ahead of time?
Yes. You can prepare the dough one day in advance and store it in the refrigerator. Before shaping the pizza, let it sit at room temperature for about 30 minutes.
What is the best cheese for Classic Margherita Pizza?
Fresh mozzarella is the traditional choice because it melts beautifully and has a rich, creamy flavor. If fresh mozzarella isn’t available, shredded mozzarella works well too.
Can I use store-bought pizza sauce?
Absolutely. Homemade sauce offers a fresher taste, but a good-quality store-bought pizza sauce is a convenient alternative when you’re short on time.
Why didn’t my pizza dough rise?
This usually happens if the yeast is old, the water was too hot, or the dough wasn’t left in a warm place long enough to rise.
Can I add extra toppings?
Yes, but remember that a traditional Classic Margherita Pizza is known for its simplicity. Adding too many toppings can make the pizza heavier and prevent the crust from baking properly.
Final Thoughts
Making a delicious Classic Margherita Pizza at home is much easier than many people think. With a handful of fresh ingredients, a little patience, and the right technique, you can create a pizza with a crispy crust, flavorful tomato sauce, and perfectly melted mozzarella.
The beauty of this recipe lies in its simplicity. Every ingredient has a purpose, and when they come together, they create a classic Italian dish that never goes out of style.
Whether you’re cooking for your family, sharing dinner with friends, or simply treating yourself to a homemade meal, this Classic Margherita Pizza recipe is one you’ll want to make again and again.
Once you’ve mastered this recipe, don’t hesitate to experiment with different herbs, cheeses, or fresh toppings while keeping the same homemade dough as your base. Every pizza you make will help you build confidence in the kitchen and bring you one step closer to creating restaurant-quality meals at home.